Thursday, June 30, 2011

The Right to Garden--A Call to Action

A major theme of this blog is that you can save a ton of money on food by growing some of it yourself, whether you can only find room for a plant or two in containers, turn your whole yard into a garden a la Edible Estates (or my Trailer Park Homestead, to a slightly lesser extent), or something in between.  I've maintained that anyone can grow a garden on some scale.  Some readers have argued that that isn't true though.  Some places, anything from areas with homeowner associations to low-income housing apparently have regulations that say that you can't garden at all in any form in some cases.  In other cases, residents are only allowed to grow decorative plants (the example cited in this case was specifically low-income housing).

This has to change.

In this time of economic difficulty for so many people, being able to grow their own food should be viewed as a fundamental human right. 

What I propose is federal "Right to Garden" legislation that would guarantee the right of everyone to grow food in some fashion.  I think that it should state that anywhere that gardening of ornamental plants is allowed, edibles should also be allowed.  If a landlord doesn't want the ground of their property torn up, they should not be able to prevent tenants from at least having a container garden.

I find it especially upsetting that low-income housing would restrict tenants from growing food.  These people are most likely dependent on food assistance from the government in addition to the housing assistance, so wouldn't it make more sense for the government to encourage people to grow their own food rather than restrict it?  This is why I think this should be pushed at the federal level: food stamp funding is largely (if not entirely, I'm not really sure) federal, so these stupid policies are cutting into the federal budget, so that is where the problem should be addressed.

With all this in mind, I'm writing my US Senators and Representative this week, along with Michelle Obama, since this issue fits so nicely with her Let's Move campaign to end childhood obesity.  I urge you to do the same.

I'll even make it easy on you:

Click here to find your Senators' contact information 

Click here to find your Representative's contact information

Michelle Obama can  be contacted at:
The White House
1600 Pennsylvania Avenue NW
Washington, DC 20500

Feel free to share your letters here in the comments and please share this post with your friends so they can help promote the Right to Garden as well!

Wednesday, June 29, 2011

Pests & Promises--A Trailer Park Homestead Update


This week, my garden has given me many glimpses of the cheap, healthy, delicious food to come.  A lot of flowers are starting to have lumps and bumps at their base, forming the foods that are to come.  Tiny green tomatoes lurk under leaves.  Some of my corn has even begun tassling. 
Future cucumbers...
future zucchinis....
futu...oh, wait.  This is past broccoli.  We actually ate this in chicken teriyaki last night for dinner!
I'd never seen a ground cherry plant before I started growing them, but I think the every increasing bushiness of these things is fairly promising!
Getting close to having homegrown tomatoes!
My blue jade corn appears to be having some interesting thoughts as well!
It isn't all sunshine and joy though.  Yesterday, when I walked out into the garden (in other words, I walked out of my door!), I was amazed at the number of insects that seem to have sprung up over night.  I'm not sure what all of them were, but among them, I discovered two of my archnemeses of previous years of gardening:  Japanese beetles and cabbage butterflies.  I will have to be much more vigilant to make sure these terrors don't tear up the garden too much...and to make sure other old "friends" like tomato worms, don't make an appearance as well!
Okay, this isn't an insect pest, but still definitely pests!  The starlings that inhabit the birdhouse attached to the garage (which should be coming down soon when they remodel it) keep pooping all over my garden below the box!  I've turned this to my advantage though.  They are now guard starlings!  Their poop protects the peas from the kids gobbling them up.  This should allow me to actually be able to save some for seed!
That flying white blob is the evil cabbage butterfly.   I used to love those things as a kid.  Now, I want to catch them all and let my kids play with them so they can't lay eggs on my broccoli, cabbage, and rutabaga and gobble the poor plants up!
And this is what happens to Japanese beetles who dare venture onto my Trailer Park Homestead!  The lot isn't large enough for one of those traps that draws them in, so if I used one of those, I'd be adding to my problem by drawing in the evil beasts from all around.  For now, I'll hand picking them (okay, knocking them...those things are gross!) and putting them in a plastic tub of water with a little dish soap in it.  I keep this tub, with a lid on it, right out in my "fields" so if I find one, I can dispose of it right away.


Tuesday, June 28, 2011

Broccoli, Cheddar, & Potato Soup


I made this last night using some of last year's garden broccoli that had been frozen and potatoes from last year.  Doing that, along with using homemade stock gave us a meal that cost less than $2 to feed the whole family, $3 if you include the saltines!  I think next time, I'll try to save a bit more money and add an extra layer of deliciousness by making some bread bowls to serve it in.

Broccoli, Cheddar, Potato Soup

 1/4 cup butter
1 onion, diced
2 tsp garlic powder
1/2 tsp white pepper
2 cups broccoli, fresh or frozen, thawed
4 cups chicken or vegetable stock
3 potatoes, cubed
1 1/2 cups milk
1/2 cup all-purpose flour
8 oz cheddar cheese, cubed
1 tsp sea salt
1/4 tsp black pepper

Melt the butter in a large saucepan over medium heat.  Saute the onion, garlic powder, and white pepper until the onion softens.  Add the broccoli, stock, and potato.  Bring to a boil and cook for 10-15 minutes, until the potatoes soften.  In a separate bowl, whisk together milk and flour.  Add to the boiling soup and stir until soup thickens.  Remove from heat.  Add cheese, salt, and pepper and stir until cheese has melted.

Monday, June 27, 2011

You CAN Afford to Eat Healthy!

I suppose I could call this "I Can't Afford to Eat Healthy" Part 2, but I'm going to focus on the positive on this one I think.  Yesterday, when I was checking out the traffic sources for the day's blog traffic, I found something a bit disturbing and sad.  Usually, looking at that is good for a laugh, since there is almost always a search for some kind of porn on it and imagine those people were very disappointed, but I hope they learned something from it.  This time, my heart was heavy after looking at it.  Of the 10 google search phrases, there were the following:  "can't afford to eat", "how can you eat healthy if you cant afford it?", "i cant afford healthy", and "people cannot afford to eat healthy".

I have news for you:  if you can afford food at all (which the first person there might not, but I'll get to that), you can afford to eat healthy.  You make a choice every time you walk into a grocery store with what you are going to do with that money, whether it be cash, credit on a card you can't afford, or food stamps.  You can even make the choice to not go to the grocery store much at all!

First off, what is healthy food?  There are so many different definitions and views on what is healthy and what isn't and oftentimes these views are completely contradictory (like vegans and supporters of the Weston A. Price Foundation, for example).  My personal definition is that healthy food is real food.  As in I could harvest it or the base ingredients myself and make it from hardcore scratch (First, you plant the seed, then you....etc).  If I don't know what an ingredient is or what it is derived from without looking it up, not good.   It is my hope that some point in the future, I'll be completely done with grocery stores with this nutritional philosophy, but I'm fairly certain I won't be living in a trailer park anymore when that happens.

In the meantime, my family of 6 gets $75 a month in food stamps and we get WIC for two children (this translates into 6-7 gallons of milk, 2 pounds of cheese, 2 dozen eggs, 72 ounces of conventional cereal, 2 18 oz jars of peanut butter or pounds of beans,  $12 of fruits and vegetables of our choice, 4 bottles of juice, and 4 loaves of bread or other whole grain exchange such as tortillas, oatmeal, or pounds of brown rice).  We usually don't have much, if any, money above this to use on food.  Yet we never go hungry, our health is great, and about the only time we compromise our nutritional values is when we do get a little extra money and splurge on convenience food or eat out.  Generally, the worst part of our diet comes from the crap they give us on WIC!  The juice, hormone and chemical laden dairy, questionable cereal, and sugary peanut butter (we don't get that one very much!) are some of the iffyist things we eat!  I'm not really complaining (okay, I kind of am), since there have been times when my entire grocery shopping trip in the dead of winter has come from our WIC selections, but they are still a lot better than what they used to be, since the fruits and veggies and whole grains are things that have been added the past few years, but still!  I tend to get very frustrated with WIC "nutritional education" since I tend to keep more up-to-date on dietary science (a hobby of mine) than the people who come up with this stuff!  But I digress...

So how does a family of 6 (part of the year only 5, since my oldest lives with his dad during the school year and is just with us for long weekends and vacations) not only survive, but thrive on so little?  I don't see we have a choice, so I do what I gotta do.  Part of it does come from the generosity of others, since the past few years, family members have been immensely helpful by my mom giving me mass quantities of veggies from her garden and we also get our eggs from a relative with chickens.  I'm trying to move away from this dependence on others as much as I can though, and I anticipate that as my gardening capabilities continue to expand (I anticipate growing as much as 300 pounds of produce on my Trailer Park Homestead this year, but don't have a scale to document it with, and I already have ideas how to do even better next year if we are still here) and we eventually get some land of our own, I should be able to grow every last bit of food we eat, with the exception of things like salt and baking soda, since both of those are minerals, on a quarter acre of land or less!  My wonderful husband's hunting skills also help since a Bambi or two goes really far to feed a family for a year, especially if that family uses meat as sparingly as we do!  I'm hoping that this year we will also be adding a fair amount of fishing to our potential freezer stock, but so far that hasn't happened.

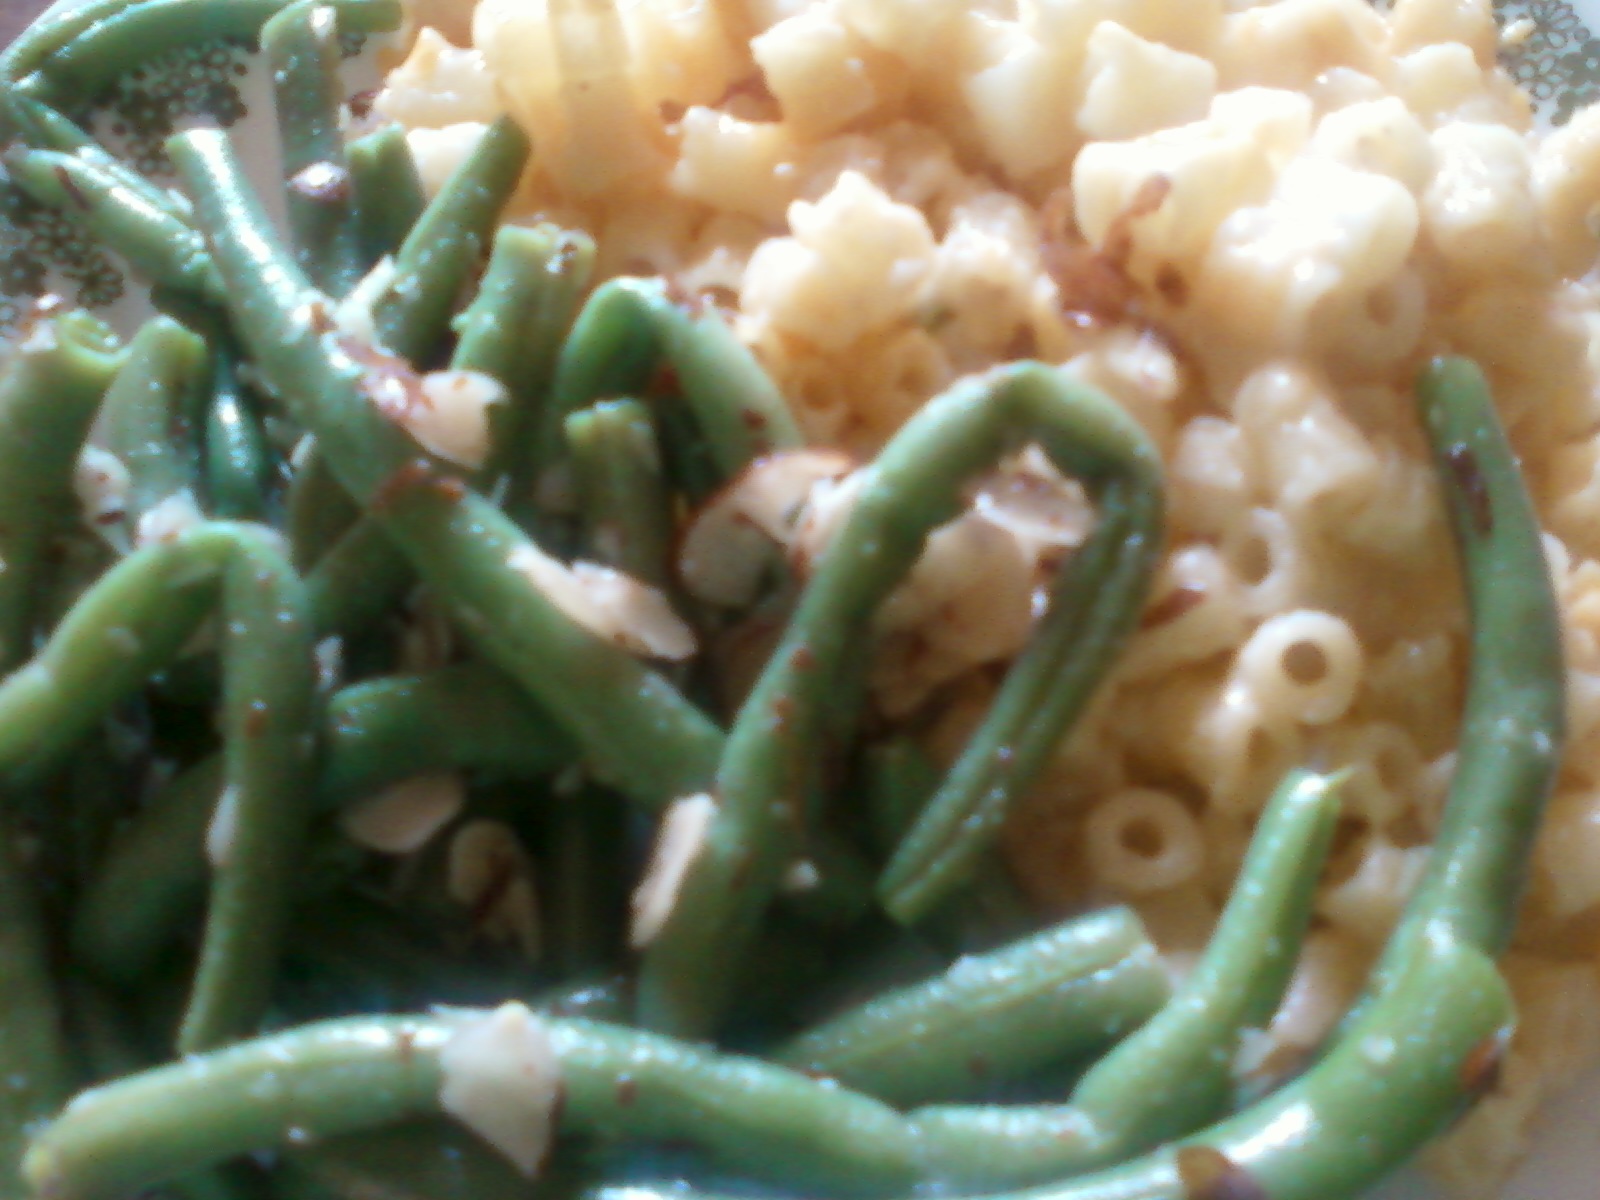
Lots of recipes on this blog to feed a family for less than $5!
Starting with the raw ingredients that I either grow myself, someone else gives me, or I buy with my meager food stamps and WIC rations, I make just about everything from scratch.  Over time, I plan on putting my entire personal recipe book on this blog, but I'm always willing to take requests on my Facebook page or via Twitter, if somebody needs to know how to make something sooner than when I just get around to it.

To make my food stamps go farther, I shop produce in season and just get things I can't grow on my own.  I use coupons (when I have them.  I probably should get better about that part).  I shop sales.  I buy in bulk, like the 10 lb block of cheddar I get for $30.49 at a restaurant supply store rather than buying little packages of cheese (it typically lasts our family 2 months, if you were wondering.  The latest block is going down much faster than normal though).  I look for special deals, like during the summer months, some farmers markets will double food stamps up to a certain amount.  Here in Michigan, that program is currently in a growing number of our markets and I shop weekly at one such market.  They'll match my food stamps up to $20 with the matching funds having to go toward fruits and vegetables grown in Michigan.  That works for me!  I'm stocking up on all the fruits and berries that I don't currently have the capability to grow on my Trailer Park Homestead! 

Okay, this post seems to be getting a bit long, so I think I'm going to stop (for now), but if anyone needs more specific information about any of this, please don't hesitate to contact me.  Leave a comment here, post on my Facebook page, shoot me a tweet, or send me an email (addy is in my bio on the sidebar) if you don't want others to see who asked the question (although I may repost it anonymously and answer it publicly, depending on whether I think others could benefit from the answer).

Sunday, June 26, 2011

Chocolate Chip Cookies

Making chocolate chip cookies from scratch is a lot cheaper than buying store bought cookies, plus they taste a ton better too!  Making your own, you also have a lot more control over the ingredients so you can eliminate uckies, like high fructose corn syrup, and stick in extra healthiness, like using some whole grains.  You may notice that my chocolate chip cookie recipe calls for a lot less chocolate chips than, say, the classic Nestle Tollhouse recipe.  That's because I've noticed that you can use far less chips without a loss of deliciousness and, since I'm not in the business of selling chocolate chips, I'm not afraid to tell ya about it!

What I usually do, since my recipe only calls for 1/2 a regular sized bag of chocolate chips, is make a double batch, but only bake up a partial batch, since I know whatever is there will be gobbled up in the next day or two.  The rest I portion out on wax paper covered baking sheets and freeze before cooking.  Then, once they are frozen, I transfer them to airtight, reusable freezer containers.  In theory, this would let me bake a few at a time without having to go through the hassle of having to mix up another batch of cookies.  In practice, my husband usually eats the raw cookie dough before I can bake them.  Good thing I use farm fresh eggs and not store bought ones that would carry a higher risk of salmonella!  This actually still saves us a ton of money, since if he didn't eat the homemade raw cookie dough, he'd be buying refrigerated store bought dough and that stuff is expensive!

 Chocolate Chip Cookies

1 cup butter, softened
3/4 cup sugar
3/4 cup brown sugar
1 tsp vanilla extract
2 large eggs, beaten
1 cup whole wheat flour
1 1/4 cups all-purpose flour
1 tsp baking soda
1 tsp salt
1 cup chocolate chips
1/2 cup white chocolate chips

Preheat oven to 375.  Mix together butter, sugars, vanilla, and eggs in a large mixing bowl.  Stir in flours, baking soda, and salt.  Add both kinds of chips and mix thoroughly.  Drop by rounded teaspoons onto an ungreased baking sheet.  Bake for 9 to 12 minutes or until golden brown.  Cool on the baking sheets for 2 minutes.  Remove to wire racks to finish cooling.

Saturday, June 25, 2011

The Need to Knead

Part 1 of my baking day yielded 3 loaves of sandwich bread, 2 loaves cinnamon raisin bread (1 of which was a free form loaf baked in a pie pan because I couldn't find my 5th loaf pan and which has already been eaten), dough gods (not pictured because they were eaten before I could take a picture), and 1 pan of brownies.  I didn't get around to making the cookies until after my husband went to work and the kids were asleep for the night--probably was safer that way.
I've posted a couple no-knead bread recipes here and I generally like them better because of their ease of preparation.  For yesterday's baking day however, I opted to make more traditional bread.  I like them better for sandwich-type bread (or, hubby willing, French toast type bread) in general.  I also just sometimes find it satisfying to beat the living crap (pardon my language) out of an innocent lump of dough.  It can be very therapeutic!

I made a triple batch so I could make 3 loaves of sandwich bread, 2 loaves of cinnamon raisin bread (when rolling out the dough, I just rolled in a handful of raisins and, after sprinkling a little water on the dough, sprinkled some cinnamon and sugar on there before flattening it again and rolling it up), and still have a loaf's worth of dough to make dough gods (fried dough sprinkled with cinnamon and sugar or powdered sugar)...which turned out not to be enough dough gods to make everyone happy, even though they weren't as good as I remember my mom's dough gods being when I was growing up.

Here is the basic recipe for the bread.  This yields 2 loaves, but is simple enough to adjust to bake more or less.

Basic Bread
3 cups white whole wheat flour
3 tbsp sugar
1 tbsp salt
2 tbsp butter
2 tbsp yeast (or 2 pkgs yeast)
2 1/4 cups very warm water
3 to 4 cups all-purpose flour

Mix the wheat flour, sugar, salt, butter and yeast in a large bowl.  Add water.  Beat quickly by hand (or on low speed using a mixer of some sort if you want to be like that) for 1 minute, scraping the bowl frequently.  Stir in all-purpose flour one cup at a time, to make the dough easy to handle.  

Turn the dough onto a lightly floured surface.  Knead about 10 minutes.  Place in a greased bowl with the greased side of the dough up.  Cover and let rise 40 to 60 minutes or until double. 

Grease 2 loaf pans.  Punch down dough and split in half.  Flatten dough with a rolling pin to form a rectangle approximately 9"x18".  Fold crosswise into thirds, overlapping the sides.  Flatten into a square 9"x9".  Roll the dough tightly to form a loaf.  Press with thumbs to seal edges as you go and fold under the loaf when it is rolled up.  Place seam side down in the pan.  Cover and let rise in a warm place 35 to 50 minutes or until double.

Place oven rack in a lower position so the tops of the loaves will be in the center of the oven.  Heat oven to 425.  Bake 25 to 30 minutes or until loaves are golden brown and sound hollow when tapped.  Remove from pan and cool on a wire rack.  Let cool completely before cutting.  If freezing, cool completely and do not cut before freezing.

Friday, June 24, 2011

Working With The Weather

It was a dark, gray, gloomy, cool and wet day on the Trailer Park Homestead yesterday.  Much too wet to do anything outside.  That's okay though, since that gave me a great opportunity to get the house cleaned up and get caught up on laundry.  I also cooked up a chicken for dinner that I'll be saving the pieces from for much warmer days that I don't want to turn the oven on to cook a chicken.  I finally got a chance to process the flat of strawberries that I got at a farmers market a couple days ago.

If it was just cool, dark, and gloomy, I would have still done some work outside.  I just decided a couple days ago that I could probably convince something to grow near the dryer vent, so I was working on that project, but then it got too wet to continue. 
Fortunately, I have plenty of things to do indoors.  I've actually been waiting for a couple of days like this.  I don't like to bake on hot days, since then I have to either suffer in a hot kitchen or make the air conditioner work harder.  Someday, I'll have an outdoor oven to use in the summer months, but probably not until we have our dream place in the country.  Until then, I just try to plan my baking to
coincide with cooperative weather.  

I'm hoping today to get several loaves of bread made (maybe even some cinnamon raisin bread.  Yum!) so I can freeze some.  I'm also hoping to get some cookies and brownies of various types made to freeze and pull out when I want them rather than overheating the house or splurging to buy some (or just doing without, but we all know that just isn't an acceptable option!).

Gotta take advantage of these cool days when I have them, since they are few and fleeting in the summer!

Thursday, June 23, 2011

No-bake Cookies

 I sure wish I'd known ahead of time that my son's baseball game yesterday was going to be a double header!  We would have eaten before hand or at least taken something with us to eat, either snacks or sandwiches.  As it was, we were tormented and tempted by a bake sale there to benefit Relay for Life.  They had a couple different kinds of cookies, rice crispy treats, brownies, and no-bake cookies. 

No-bake cookies at bake sales have always been somewhat special to me.  We never had no-bakes in my house growing up, since my mom was allergic to chocolate.  Somehow, I don't think no-bake cookies made from carob powder would have held the same appeal (but it should be possible in theory!).  Fortunately, now I know how to make no-bake cookies myself so I can have them any time I'd like.  These cookies are perfect for summer, since you don't have to turn the oven on to make them, but you'd want to make sure that the house was still cool enough for them to set.

No-bake Cookies

 2 cups sugar
1/2 cup cocoa powder
1/2 cup butter
1/2 cup milk
1/2 cup peanut butter
3 cups oatmeal
1 tsp vanilla

Combine sugar, cocoa, butter, and milk in a large pan.  Bring to a full rolling boil and boil for one minute.  Remove from heat and stir in peanut butter, oatmeal, and vanilla.  Drop by rounded teaspoons on waxed paper and allow to set.

Wednesday, June 22, 2011

Flowering Frenzy--A Trailer Park Homestead update

 I'm so excited!  It seems like just about everything that needs to produce flowers to produce yummies has flowers this week.  And some, like the zucchini pictured above, are starting to think about making me food!  Based on the number of flowers in the zucchini area, you can probably expect a lot of zucchini recipes pretty soon!

Here's what else is growing on this week at the Trailer Park Homestead:
Cucumbers look to be coming along nicely as well, which is fantastic, since my 6 year old can't ever seem to get enough cucumbers!  It's so hard to get kids to eat fruits and vegetables...I can't keep enough around for them!
I may have to fight the kids off of these!  Blueberries are one of my favorites so I'm so excited that a couple of my blueberry bushes are actually producing at least a little somethin'-somethin' for me this year!
My third pretty broccoli head!  I'll wait a few days, then I think this will be joining some snap peas from the garden in some chicken teriyaki!
I'm so glad that there are approximately 50 billion flowers on my tomatoes, since I'm out of tomato sauce from last year and would like to get some made soon and don't want to have to buy maters from the farmers market to do it!
Still not sure what these are, but I think I'm getting some ideas.  Definitely still puzzled on how they got in that tomato bucket though!  If you think you know what they are, be sure to head over to the contest to figure it out before they reveal themselves, which may be soon, since it looks like they are thinking about popping out some flowers too.
My "Three Sisters" are really starting to play together nicely.  Look how nicely that bean is climbing up that corn!  Unlike my kids, the three brothers and the one sister, I didn't have to constantly referee these guys to do what they are supposed to!
I currently have four planters of lettuce going (the one we actually are eating out of isn't pictured this week) in various stages of growth.  The bottom planter in this picture did contain the original lettuce that I started oh so early in the season, but those got ucky, so I pulled them, dumped the soil onto the potatoes, cleaned out the planter, put in some fresh soil and am getting ready to grow another crop.
This was a "non-essential" project I got done this week.  There was just a pile of rocks with weeds growing around the base of the lilac bush.  The original plan was to pull out the rocks, put down some landscape cloth, then just piling the rocks back on.  I pulled the rocks off, but then decided this would be another nice area to have a little shade bed.  Eventually, I'll probably put herbs in there (catnip?), but I couldn't stand to have a bed empty that long, so I stuck some lettuce seeds in there.  I just can't seem to get enough lettuce this year.  Yum!  This patch finished off a packet of lettuce I got nearly two years ago as well.
This is the view from my driveway.  It makes me so happy to see this every time I get home from someplace!  I sure like my Trailer Park Homestead!

Tuesday, June 21, 2011

Catnip Catastrophe

What could have been
Okay, maybe it isn't a full blown catastrophe, since there was only 2 plants to begin with, but I'm still pretty bummed.  I'm not sure if I mentioned it before, but about a week or so ago, I found a couple little catnip plants growing amongst my Three Sisters beds.  The first plant, I didn't notice what it was until I'd yanked it out of the ground, but once it was on the backpull, headed up toward my nose, I apologized profusely to the little thing, and lovingly replanted it somewhere that I'd like it to grow up and be a big plant.  A few days later, it unsurprisingly died.

The second plant, I noticed what it was before unceremoniously yanking it from the ground, so I carefully transplanted it to its new home.  I was waiting to see how it would fare before writing this post though.  Then today, I was weeding in the garden and noticed the little kittennip (that's what baby catnip plants are properly called, right?) plant was gone!  Completely gone!  Not a trace left of it.  I think something must have ate it in the night or something. 

Definitely am seriously bummed!

I don't have any cats, in case you are wondering.  In fact, I'm horribly allergic to cats and prefer to stay far, far away from the adorable little fuzzballs, since I value my ability to breathe.

Why am I so upset about losing a couple catnip plants then?  Catnip isn't just for kittehs you know!

Catnip has many uses beyond getting Kitty high.  It can be used as a herb in cooking and goes really well with lemon and chicken.  It can also be used as a tea to help aid sleep, to calm someone, or to help bring down a fever.  You can also rub the plant on yourself as a mosquito repellent, or, if you are crafty enough, make essential oil from it to make a super potent homemade mosquito spray, more powerful than commercial products containing DEET...and it's a lot safer than DEET containing sprays as well! 

And all that is just off the top of my head! 

I'm sure it has many other uses too that I haven't thought of at the moment, but since I'm in catnip mourning until I can find more catnip plants, I don't feel like looking up more or citing my sources for the uses I've listed, or even digging up my recipe for lemon catnip chicken (goes great on rice!).  I suppose I could buy some catnip seeds or probably even plants, but considering it is a fairly prolific weed, that doesn't seem very thrifty to me!  Instead, I'll keep my eyes open and find some more freebie plants, somewhere.  Maybe even growing in my garden again.

Monday, June 20, 2011

Meatless Monday: Broccoli & cheddar quiche

You may have noticed by now that I'm quite fond of quiche, since this is the third quiche recipe I've posted on this blog.  And why wouldn't I be?  It is relatively quick, doesn't require a lot of preplanning by getting anything out of the freezer ahead of time to thaw, makes superb leftovers for breakfast, and, considering I get my eggs and most of my veggies for free, can usually get cheese at a super cheap price, and can make my own pie crust (thanks to the help of a friend!), it is a really cheap meal as well.  The quiche pictured here, featuring the fantabulous broccoli, freshly harvested from my own garden while the pie crust was resting in the fridge, probably cost under $3 to make and it fed 2 adults and 3 kids for dinner with enough left for two servings of leftovers!

Broccoli & Cheddar Quiche

6 large eggs
1/4 cup milk
1 head broccoli, chopped into smallish pieces (or equivalent frozen)
2 cups shredded cheddar cheese
1/4 tsp salt
1/4 tsp black pepper
9-inch pie crust

Preheat oven to 375.  Whisk eggs.  Stir in milk, broccoli, cheese, salt, and pepper.  Pour into the pie crust and bake for 30 minutes or until the center is set.  Let stand 5-10 minutes before cutting.

Sunday, June 19, 2011

Dancing Without So Many Dollars

My daughter, hamming it up backstage
Dance recitals can be expensive!  I was spoiled the past couple of years by having my kids dance at the Jackson School of the Arts, which is a non-profit with the objective of "making the arts accessible to Jackson County youth regardless of income."  There, the costumes were borrowed, with only a $10 cleaning fee to use them, the photography and videos of the recitals were reasonably priced (I don't remember how much the photos were, but do remember you could get them a la carte, so I just bought the shots I wanted rather than a package and the videos were $15), and the ticket prices weren't terrible either.  They also weren't picky about things like the kinds of tights used in the performance or whether the kids wore stage make-up, so parents could choose things that fit their budget.

This year has been very different.  We moved away from Jackson, so had to find someplace else to have the kids dance.  We came in late enough in the year that I opted to not let my son dance this year in a full year course, since it would screw up the plans for the recital, which were already in the works.

At the school she's in this year, costumes had to be purchased.  Her class had one of the cheapest ones--at $53!  Tights have to be the exactly the same, so they have to be purchased through the school--at $8 a pair--and of course they recommend you have a spare on hand in case one gets torn!  A video is $45 and photo packages start at $25 with no option to only buy a la carte.  No cameras of any sort are allowed at the performances either, so if you want a video of the actual recital, you have to buy one of theirs.  Makeup is also mandatory (at my daughter's age, just blush and lipstick).

Despite these constraints, I still found ways to save money.  I did buy one of the portrait packages, because I didn't think my phone's camera would take a good group picture like some of the moms were doing.  A lot of these same moms were planning on taking their ballerina bears to chain studios for cheaper portrait packages that included a lot more prints than the one offered on-site.  While no video recording was allowed at the recital, recording was allowed at the dress rehearsal.  I don't have a video camera, but one of the other moms did and she also had a baby with her, so I offered to hold the baby while she videoed, if I could get a copy of the video later.  (To tell the truth, after seen how hard my baby girl was trying to do her best at the recital, more than she ever has in her short little life, I'm thinking that video may be worth the $45, if it is still available and I can come up with the money somewhere!)  I don't wear makeup and didn't want to buy some special just for the one thing, so I borrowed some blush from my mom and got some lipstick samples from a friend of a friend that sells Avon.  As far as the $8 tights went, I took my chances and just got the one pair--and it worked out fine.  If I was really looking to pinch pennies, I could have volunteered to work backstage during the recital and saved myself a ticket price that way, but I was backstage for her performances for the last 2 years, so I was thrilled to be able to just sit back and enjoy the show this year, even if it did cost $13!  Totally worth it!

Someone got worn out.
So, yeah, it still cost a small fortune, but seeing that grin on her face when she was on stage and feeling that enormous swell of pride in my heart for my baby girl, it was worth every penny.  And, yeah, we're planning on doing it again next year.

Saturday, June 18, 2011

I Feel So Exposed--a Trailer Park Homestead mini-update

Well, that tree behind the house that I was told was coming down by the contractor came down in the wee hours of yesterday morning.  Never did get a notification that it was going to happen, so I'm glad he had told me, or I probably would have been pretty freaked out to be woken by the sound of a chainsaw right outside my bedroom just before 8 this morning!

After a nap, I went out and investigated what I was left with.  I found this:
For comparison, here is what it looked like with the tree still there:  
I raided the compost bin for a new project yesterday, so that's why there is less in there, but, even with a lot less in it, it was a lot more visible this morning!  You could even see it from the road.  Oops!

I did find a treasure upon further inspection though:
Free mulch!  The needles from the tree that was there and the sawdust left behind from its removal were just what I've been wanting to cover the landscape cloth on some of my beds, so I could take out the bricks that had been holding it in place.  Perfect!

So most of my afternoon was spent gleefully moving that stuff onto my garden beds that needed it.

Ta da!  Isn't it pretty?

The problem of hiding things that may not make management happy remained though.  I transferred the remaining compost to a broken storage tub I had in the garage and took down the chicken wire and stakes that had been marking the boundaries to hide the evidence until I can get some sort of privacy screen or fence back there.  Then, I took the bricks that had been freed up by the mulch around my plants and built a little shelter around it.
Compost?  What compost?  The boards on top are the slats that will eventually be going on the potato condo, but helping conceal the compost is a nice temporary job for them.

So this is what I ended the day with:
 I had thought that my only option back there to put my privacy back was a screen of some sort that could be easily removable, but I talked to some neighbors tonight (the ones that have the demolition derby cars in their driveway.  They are actually demolishing their house since it would cost $3000 to remove and it is too moldy for anyone to live in.  This way, they can take bits out at a time in their pickup.  Talk about thrifty!  I digress though...) and they said that one privacy fence per lot is allowed, so maybe I have more options than I thought!


Friday, June 17, 2011

Meatball Subs

Who wants a $5 Footlong when you can have these homemade subs for a lot less money (like $5 to feed the whole family!), minus meat of mysterious quality, that taste so much better, and you don't even have to leave home to get them!

Mini Meatball Subs


3 cups plain tomato sauce (preferably homemade with homegrown tomatoes)
1 1/2 tsp basil
1 1/2 tsp oregano
1/4 tsp onion powder
1/4 tsp garlic powder
24 meatballs  or enough to fill the subs
8 whole grain mini sub buns
8 slices mozzarella cheese

Preheat oven to 400 degrees.  Combine tomato sauce, basil, oregano, onion powder, and garlic powder in a small casserole dish with a lid.  Stir in meatballs so they are coated in sauce.  Cover and bake for 20-25 minutes.

Open sub buns and place, open end up, on a baking sheet.  Split cheese and place it so it covers bottom of buns.  Bake for 10 minutes or until cheese is melted.

Spoon heated meatballs on sub buns and serve.


Thursday, June 16, 2011

Sauteed Green Beans with Almonds


We had these a couple days ago and they were amazing!  I was afraid that they wouldn't be that good, since I was still using beans frozen from last year and not fresh, but they were seriously the best beans I've ever had!

Sauteed Green Beans with Almonds
with baked macaroni & cheese
2 tbsp butter
1/8 tsp garlic powder
1/8 tsp sea salt (more to taste)
1/8 tsp black pepper
4 cups green beans, ends snipped off
1/4 cup slivered almonds

Melt butter in skillet.  Add garlic, salt, and pepper.  Add green beans and saute for about 5-10 minutes.  Add almonds and saute about 5 minutes more.

Wednesday, June 15, 2011

All's Quiet on the Trailer Park Homestead


For the first time, I'm more or less caught up on the homestead.  Everything is planted.  Everything is weeded and watered, for a couple days anyway.  No major construction projects need to be done.  Now maybe I'll finally get a chance to catch up on some of the non-essential projects, like landscaping for the sake of landscaping or doing some deep "spring cleaning" inside the house.

Here's what's all growing on:
Here is an updated picture of my mystery plants.  If you think you know what they are, be sure to go to the contest post to enter to win!
The potatoes seem to be thriving in the moved potato condo.  I buried them shortly after this picture was taken.
This is a plant that came with a planter I got from Freecycle.  I didn't really want the plant and dumped it in the compost bin when I took the pot to put a blueberry bush in.  The darn thing wouldn't die!  When I moved the compost bin, I gave up on killing it and decided to just incorporate into the landscaping.
The flowers, sunflowers and calendula, are already coming up in the back of the St. Patty's bed.  I always find that somewhat amusing that I have gotten to the point that I'll have second plantings going around the time that most people in the area are just getting their gardens in.
The peas on the steps aren't looking so good, so I told the kids not to eat these peas, so we can save them for seed.  Then, I plan on letting them die and moving some of the peas that are currently on the backside of the front garden bed to here so the tomatoes can have the strings to climb.
I think this is the prettiest head of broccoli I've ever grown.  Where we used to live, cabbage moth caterpillars would always eat my plants up so bad that it really wasn't the effort.  I decided to give it a shot here anyway, and it looks like it's paying off!  I suspect some broccoli recipes will be coming up soon on the blog....
Basil's finally up.  The front garden lined by rocks seems to be shaping up to be predominantly a herb garden.
There are about a dozen or so blossoms in this planter at last count.  Yup, I'm definitely starting to worry about the abundance of zucchini!  There'll definitely be some zucchini recipes coming up soon too, barring some kind of catastrophe.